Timesheet Entry
Why should I use this form?
Daily Timesheet facilitates employees to record and maintain their time sheets on daily basis.
Pre-requisites
· One or more active projects should be allocated and approved.
Who can access this form?
This form shall be visible to all employees to whom the visibility is given in Setup HRMS ® Module Role Mapping/ Module Administration.
How to navigate to this form?
Self Service à Timesheet Management à Timesheet.
The field guidelines are as follows:
Field Name |
Description |
Select Date |
Select Date for which the timesheet details to be entered. |
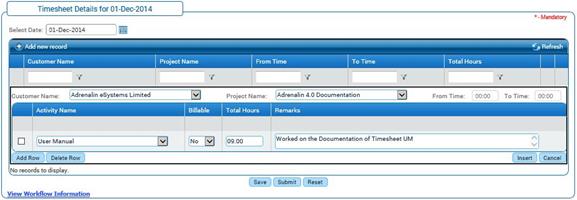
Add new record |
Click (+) Add new record on the left corner. On clicking the following fields are displayed. · Customer Name · Project Name · Activity Name · Billable · Total Hours · Remarks |
Customer Name |
Select customer name from the drop down. This field displays list of customers allocated for the employee. |
Project Name |
Select project name from the drop down. Projects which are mapped for the selected customer gets populated in this field. |
Activity Name |
Select activity name from the drop down. Activities which are mapped to the selected project gets populated in this field. |
Billable |
Mention whether the activity is Billable or not by selecting Yes or No from the drop down. |
Total Hours |
Enter the number of hours worked on the activity in Total Hours field. |
Remarks |
Enter the brief description of the activity done in the remarks field. |
Click [Insert]to add the record.
After clicking the insert button the record gets added in the grid as shown below.
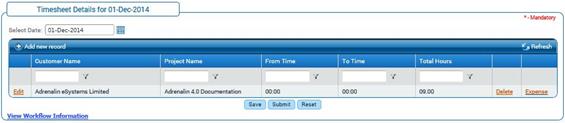
Click [Save] to save the record, which can be edited and submitted later.
Click [Submit] to send the record for approval. Once submitted, it cannot be edited further.
Edit
To edit a record, click the Edit option.
After clicking the edit option, the screen displays the record to be edited as shown below.
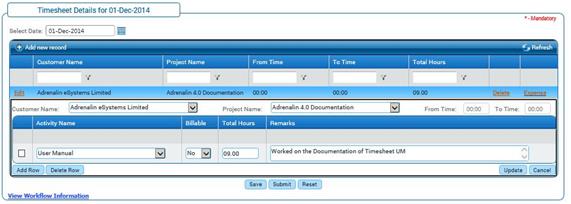
Make necessary changes in the selected record.
Click update to reflect the changes done.
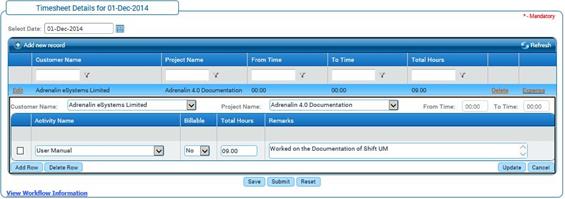
Click [Add Row] to add more activity.
Clicking [Delete Row] after selecting the record will delete the selected row.
Click [Reset] to refresh the form.